Tarps News Categories
How To Attach A PVC tarp to PVC pipe
How To Attach A PVC tarp to PVC pipe
I love carpentry and building arbitrary things to tackle issues and irritations around the house. My concern is that my carport is fixed with open racks and costly gym equipment and I can't have sawdust everywhere. I utilize my carport for gathering of these ventures yet need to do my cutting and sanding outside. I live in Alabama and it's getting hot. I required an outside workspace that was covered however didn't have any desire to burn through $100+ for a quality spring-up shade tent. This is my answer. Appreciate.
Note: This is intended for covering just, not a downpour. On the off chance that you need to make one utilized for a downpour, I'd propose utilizing pressure-treated wood and augmenting the PVC tarp upholds.
PLAN
I use numerous provisions that I effectively own to reduce expenses. For the shade, I am utilizing a 10' by 8' PVC tarp. I plan on one 8' side attaching to my home with guides screwed into the eave. I plan on mounting a piece of PVC to the next 8' side that has two 90 elbows. Each elbow will have an eye bolt for the helpline to attach to. A leg will likewise attach to every leg for the greater unbending nature of the design. The anchors will be ash blocks. I need to have the option to set up and require down in almost no time.
Supplies and Tools
I had every one of the devices and a portion of the provisions. I burned through $36.57 before charges. The costs in brackets are what I paid at my nearby Lowes before the charge.
Supplies
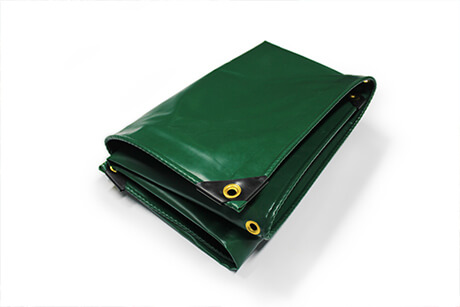
1 - PVC tarp
3 - 10' lengths of 1" Schedule 40 PVC ($11.25)
2 - 1" measurement 90-degree PVC Schedule 40 elbow ($2.60)
2 - 1" measurement 90-degree PVC Schedule 40 coupling ($0.92)
2 - 1" breadth PVC Schedule 40 Plug ($1.80)
2 - 1" measurement PVC Schedule 40 Adapter ($1.32)
3 - 4" metal snares
5 - 2" machine screws*
9 - little washers*
7 - lock nuts*
2 - 1/4" x 4" Zinc eye bolt ($1.04)
2 - 4" full string bolts*
2 - bungee ropes
2 - soot blocks ($2.76)
PVC preliminary
PVC concrete
Blue Hawk 3/16in x 75ft Diamond Braid Poly rope ($4.78)
* burned through $9.82 on the misc equipment, some of which came in bigger boxes
Instruments
Responding saw (or hacksaw)
Drill
Screwdriver
Pincers
Lighter
Measuring tape
Dremel (discretionary)
Cut and Glue PVC
Cut the PVC, utilize whatever sort of saw you are generally OK with.
PVC tarp piece: 8'4" long
Legs: 7'
Prime each finish of the legs and PVC tarp piece just as the couplings and elbows. At the point when dry, stick them set up. The PVC tarp piece gets an elbow on each end with the end not stuck being strung. Every leg gets a coupling toward one side and a strung connector on the other. Let dry.
Attach Hardware and PVC tarp to PVC
Imprint where the grommets are onto the PVC tarp piece of PVC. Drill openings for the bolts to attach. I utilized some piece of wood to make a dance to bore straight and focus into the PVC. Supplement machine screws with washers, then, at that point PVC tarp, then, at that point washer, then, at that point lock nut. When all were set up I utilized my Dremel to remove the abundance to ensure the screws didn't puncture the PVC tarp.
Toward the side of the elbow, drill an opening for the eye bolt. Addition with washers on each end and fix with a lock nut. I additionally remove the overhanging part with my Dremel.
End Cap and Spike
At any point attempted to pound a tent stake into red mud in the mid-year when it hasn't come down in three weeks? If not, it's unimaginable. These little men will adhere in enough to keep the leg still, however.
Drill opening through each end cap in the middle. Addition bolt with little washer within with a huge washer and lock nut on the outside. Fix right down. Try not to remove the overabundance as this fills in as the spike to place in the ground. Sled into the leg couplings on every leg. I didn't stick the covers into place in case they should be eliminated.
Attach Support Lines
Cut lengths of whatever sort of rope you use. I utilized jewel mesh poly rope that is dazzling red for perceivability.
Attach to eye bolt with a figure 8 finish hitch. There might be better bunches to utilize however I like this one as it's solid and simple to recollect. Tie a circle tie at the opposite end for attaching the bungee rope.
Attach Hooks to the Eave for PVC tarp Connection
Measure out an arrangement for the snares. Drill openings into the eave and screw the snares set up.
Set Aside
Unfasten lines from the ash blocks. Unscrew legs from PVC tarp piece. Unfasten PVC tarp from house. Lay level with the underside uncovered. Spot legs inside close to the PVC tarp piece. Fold support lines and bungee lines inside.
Note: I saw a defect now that the bolts at the lower part of the legs are uncovered and might punch a hole in the PVC tarp. I fixed this by cutting a length of 7/8" dowel and boring an opening for the spike fasteners to screw into.
Wrap up the PVC tarp with every one of the treats inside. I utilized little bungees to wrap up and hold shut the shelter for capacity. Stack far removed until the following undertaking emerges.
Step by step instructions to Make a PVC tarp Shade Awning
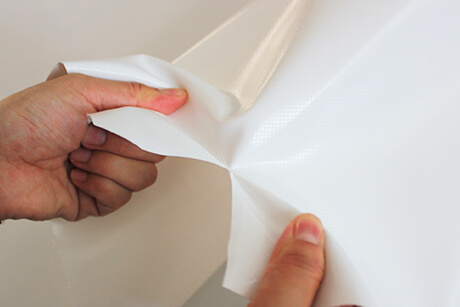
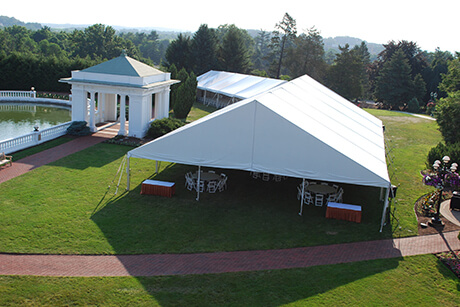
If you invest a great deal of energy outside, fishing, setting up camp, or simply unwinding in your back yard, then, at that point utilizing a PVC tarp conceal shade is the ideal method to stay away from the sweltering summer sun. This overhang is a transitory construction that isn't hard to raise or dismantle. Even though you can pay for a spring-up tent, a shade overhang is more affordable and will keep the daylight away from you similarly just as a retail form. Nylon network PVC tarp is breathable and arrives in an assortment of colors. So you don't need to settle on a style.
1
Clear all flotsam and jetsam from the space where you need to develop the PVC tarp conceal shade. Select a 12-by-12-foot area on the ground. Use shower paint to stamp every one of the four corners of that square area.
2
Spot one plastic, the 5-gallon container on each edge of the square. Spot a 4-inch distance across, 2-foot long polyvinyl chloride (PVC) pipe upstanding in the focal point of each pail.
3
Pour 1 sack of universally handy sand around every PVC tarp in the cans, keeping the pipes upstanding. The sand will hold the pipes set up.
4
Drill a little opening in the highest point of four 3-inch distance across, 8-foot long PVC tarps. Screw one screw-in eyelet into each opening. The PVC tarp will attach to those focuses.
5
Attach one S-molded snare to each corner grommet on a nylon network PVC tarp that actions 12 by 12 feet. Attach the opposite finish of every S-molded snare to the screw-in eyelets at the highest point of the 8-foot long PVC tarps. Spot the lower part of those PVC tarps into the PVC tarps in the plastic cans.
Instructions to Use a Tree as an Anchor to Build a Canopy
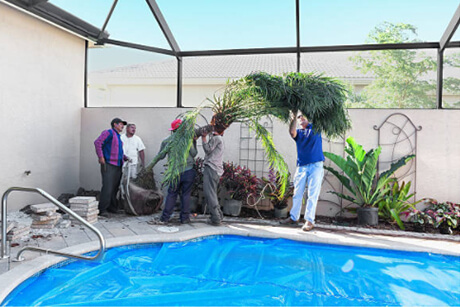
Appealing shade overhangs can consolidate the magnificence of living plants with the common sense of open-air texture to make an eye-getting shelter from the sun. At the point when you utilize a current tree as an anchor, this undertaking takes on a fascinating look that attaches nature with man-made beautification. Ideal for that uncommon open-air living space, a shade shelter entices you to take a seat, open your #1 book, or taste some lemonade and unwind.
1
Measure out a 12-by-12-foot square on the ground with your ideal tree in the corner. Imprint the leftover three corners of the square by putting an enormous outside grower on the ground. Put a little rock in the lower part of every grower. This will assist with wastewater.
2
Put water in the lower part of a huge container and add a substantial blend per the producer's suggestions. Blend the substantial until it arrives at the consistency of the hotcake player. Spot one of the 24-inch bits of PVC upstanding in the focal point of one of the 5-gallon cans. Cautiously pour or scoop the substantial blend around the pipe to hold it set up. Rehash with the excess two cans. Permit the substantial to set for the time being.
3
Spot the 5-gallon containers inside the huge grower with the assistance of a right hand. These will be your three other anchor focuses for the shade.
4
Spot every one of the shafts in the PVC tarps. Make a little opening, utilizing a drill, close to the highest point of the three wooden shafts, 8 feet starting from the earliest stage. Drill an opening in the side of the tree, 8 feet off of the ground. Eliminate the posts from the pipes and screw an eyelet into each opening. Screw an eyelet in the opening of the tree.
5
Loosen up the open-air texture on the ground. Utilize the grommet pack to introduce an enormous hardcore grommet on each side of the piece of texture. You will utilize these grommets to attach the shelter to the anchor focuses.
6
Attach the texture corners to the eyelets by stringing a link tie through every eyelet and the grommet and pulling it firmly. Attach the fourth corner of the texture to the eyelet in the tree in a similar way.
7
Spot the wooden posts inside the PVC in the focal point of the cans. This will extend the overhang, and hold it up. It will wrap over space beneath.
8
Top the grower off with fertilized soil to conceal the 5-gallon containers and the foundation of the shafts. Plant blossoms in the grower to give the shelter a complete appearance.
you may also like
- Tarp End Dump 28 ft Black Mesh
- 10 oz Pvc Coated Fabric
- Clear Tarpaulin Tent Material
- 18oz Vinyl Flatbed Truck Lumber Tarp with Flap
- Clear Tarp Transparent PVC Tarpaulin for Cover
- 12 oz Pvc Coated Fabric
- Tarp End Dump 32 ft Black Mesh Heavy Duty PVC Coating Mesh Sheet
- 5' x 7' Clear Fire Retardant PVC Tarp
- Heavy-duty Vinyl Coated Mesh Tarps
- 60% 12ft x 12ft shade PVC Vinyl Black Mesh Tarp Dump Truck Tarps
others also viewed
- How Long Does Vinyl Tarp Last?
- PVC Tarp - Why Are Plastic Tarps Blue?
- DIY PVC Tarp Pole
- What Is The Difference Between Steel Tarps And Lumber Tarps?
- The Benefits of Canvas Tarps
- How to detect the density of pvc coated fabric
- How to clean pvc tarp
- Top 5 Best Tarps That Are Worth Your Money
- What Materials Are Used for Tarpaulin? – A Manufacturer's Perspective
- Custom Heavy Duty Or lightweight PVC Vinyl Dump Flatbed Truck Tarps & Covers For Sale