Product Categories
How to build a canopy of PVC and tarp

How to build a canopy of PVC and tarp
In this case, you will need one or two support pillars. The easiest way to make them is from a three-quarter-inch steel pipe. So that such support can be transported in the trunk, we make it collapsible from segments 1.2–1.5 meters long. As a connecting element, we use two bolts welded with a diameter of 16 mm. An ordinary hairpin of the same section with a nut screwed onto it will do. To make the connector fit snugly into the pipe, you can wrap it with several layers of electrical tape. To make it easier to fix the rope on the pole, insert a similar adapter made of bolts with a diameter of 10 and 16 mm into the upper part.
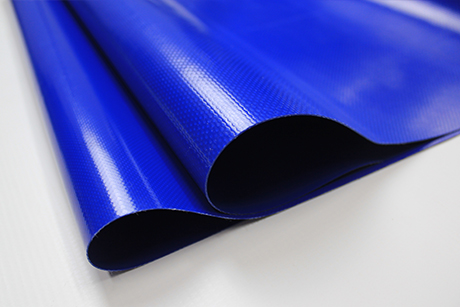
It is unnecessary to use a large panel; it will be challenging to pull it into the forest. In confined spaces, it is perfectly possible to take one or two small pieces of tarpaulin to cover only the areas you need. If you nevertheless decide to use a large-sized canvas, you will need a thicker rope for the central support that can withstand the load.
The ropes can be left tied to the sheet to speed up the assembly, especially when you will be attached to the posts, not the trees. Before assembling, it is worth trying the ropes to the supports and installing them to not slack.
The rectangular sheet of tarpaulin can be twisted along the central rope to select the most comfortable position. We advise you first to spread it on the ground and figure out how you can cover the maximum area of the site.
If you urgently needed to build a hinged structure for a summer residence with your own hands, you can effortlessly do this. To construct a canopy, take
· Two five-meter PVC Tarpaulins (vinyl);
· Two pieces of thick polyethylene (shower curtains are suitable);
· braid, strong thread.
Build the canopy according to the instructions:
· Sew the curtains into one large piece of fabric.
· From the braid, make 40 loops on which the awning will be held (cut 40 relevant sections).
· Sew the loops to the plastic.
· Put the loops on the pipes.
Then decide on the place of installation of the structure. Stake the focuses on the ground where you will embed the shade pipes. Set up your system by digging PVC Tarpaulins into the ground. Your canopy is ready! Fantasy will tell you the colors of the curtains - and the awning will come out fantastic.
Modern materials suggest other design solutions as well. Using clips (likewise PVC), take plastic pipes and collect a rectangular casing (having recently drawn its outline). Append a thick fabric or plastic on top. You will get a great garage.
Similarly, you can make an all-inclusive construction from slender plastic pipes and strong polyethylene. Such lines bend easily. Experiment with arched shapes. You will have a foldable portable attachment. Use a little work and patience - as a result, you will have such a necessary shed in the country.
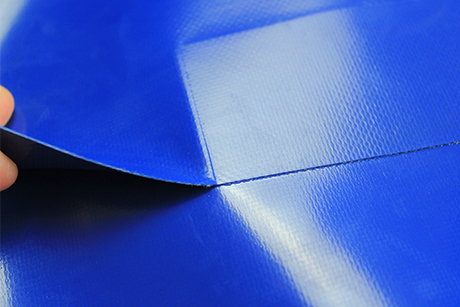
How to make a PVC Tarpaulin garden shed
PVC Tarpaulins are so easy to use that artisans constantly find different uses for them. They can be utilized to assemble a unique nursery shed and, surprisingly, an undeniable gazebo. The cycle won't take a lot of time, and the outcome will satisfy you. The process will not take much time, and the result will please you. Despite its simplicity, the construction of plastic water pipes will turn out to be reliable and will perform its functions perfectly. For a do-it-yourself garden shed, you will need PVC Tarpaulins for the frame, four pieces of reinforcement, fabric for the awning, twine (if necessary), and flower pots. Be sure to check that the pins fit inside the pipe. The inner diameter of the lines is 12 mm, and they are connected to tees and fittings. Awning made of any dense fabric, the edges can be pulled to the pipes with nylon twine, or the edges can be sewn to thread the tubes inside.
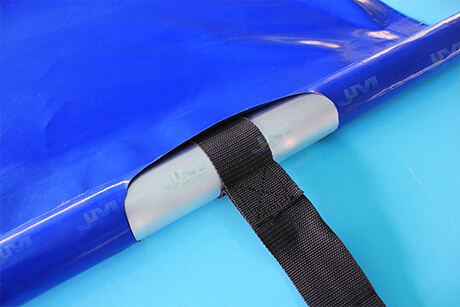
How to tie a rope at a height
It is not necessary to climb 3-4 meters to secure the center rope to the tree. You can tie a stone or stick to the string and throw it over the branch at the required height. And you can connect a knot at a level convenient for you. If there are no suitable branches, the rope is wrapped around the trunk several times and fixed, for example, with a boat oar. By the way, with such a paddle with a T-shaped handle, it will be convenient to remove the rope from the branch when disassembling the canopy.
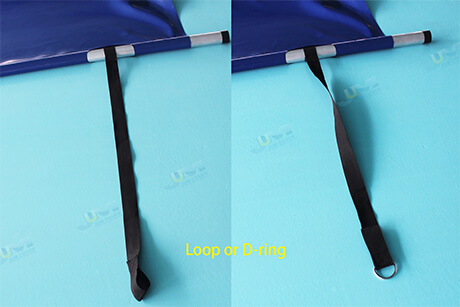
The choice of materials for the canopy
For the installation of a canopy at a summer cottage, materials from wood species are suitable. Durable pine is most convenient. The solid wood of this reliable tree can decorate any exterior. The ease of use of pine is due to the not too large weight of the material. The choice of materials relies upon the size of things to come canopy. Functional purpose also plays an important role. Before arranging the structure, it is vital to draw up a diagram. A wooden ceiling consists of the following main elements:
· walls or screens - 5 pcs.;
· racks - 6 pcs.;
· beams or boards - 4 pcs.;
· lathing;
· material for the roof.
Underlying components can be associated with utilizing secures, metal corners. To check the evenness of the joints, experienced craftsmen recommend using a building level.
Laying the foundation for the canopy
Before laying the foundation, it is crucial to choose the right type of foundation, coordinating it with the structure of the canopy. All dimensions of the design and its foundations must be calculated in advance.
If you do not provide an additional foundation for a wooden canopy, you can drive the support posts for the top into the previously prepared pits. For boring wells, it is sufficient to have a drill. However, a standard digging tool will do. The holes should be in line and have a depth of about 50 cm. To check the horizontality of the foundation being built, a building level is required.
Installation of the frame and roof
Support posts should be installed at a distance of 1 m from each other. This will ensure that the awning hangs at a length of 2 m, and the side elements of the structure - by 0.5-1 m. Before pouring the pits with concrete, they should be covered with squashed stone for the greatest casing strength. For accurate laying of the rafters, the beams should be cut in height with a bevel at an angle corresponding to the slope of the future roof of the canopy. The racks should not have a size of less than 1.8 m. To cover a 6 m span, beams with a cross-section of 150x50 mm will be sufficient. Rafters can be made of them by placing them at a distance of 1 m from each other. Next, you can proceed with the installation of the battens on the rafters perpendicular to the beams. Self-tapping screws for wood ought to be utilized as a clasp. That, you can proceed to the installation of the awning.
We build a canopy - quickly and easily
The idea of \ u200b \ u200bbuilding a canopy from fabric is simple to disgrace, and it is surprising why it is so rarely used! But everything is straightforward. It is vital to introduce upholds in the pre-arranged compartments and fill them with any material nearby - soil, sand, squashed stone. Preferably, it is ideal to utilize a concrete mortar. Then, at that point, you can be sure that the backings are safely secured. Then everything is simple - depending on what you will use as an awning, place the supports at the selected distance and pull the roof between them, tying the ends with a rope. Everything, an impromptu canopy made of fabric for a summer residence, is ready. Its unique advantage is that you can fold and remove the awning in the closet when leaving for the city. If it is possible to attach a tent to a tree branch, this will be ideal for relaxing.
Preliminary work before construction
We were thinking over the canopy scheme, drawing a drawing. We choose a place for the extension, clean and level it, make markings for the supports. To protect the wood from mold and rot, we treat wood parts with an antiseptic. With an instant arrangement or, for instance, paint with a preliminary, and afterward paint. We will prepare the supports for the structure. We take five pieces of wood (90x90 mm). Since the roof is planned to be sloped, the bars intended for the front supports should be less by 40-50 cm in height, measured on the wall of the house. We prepare rafters and blanks for the lathing. We fix the upward distance on the structure with a level bar (2.4 meters).
You may also like
- European Side Curtain-White
- Heavy-duty Vinyl Coated Mesh Tarps
- Truck Flatbed Trailer Tarps Lightweight Lumber Tarp 24x27 (8' drop)
- Clear Tarp Transparent PVC Tarpaulin for Cover
- PVC Tarpaulin Wateproof Fabric Flatbed Lumber Tarp For Heavy Duty Truck
- Waterproof PVC Canvas Tarpaulin Fabric Dump Tuck Tarp Vinyl Mesh Tarp
- 6' x 12' Clear Vinyl Tarp - 20 MIL - Fire Retardant Clear Vinyl
- Glass Clear Tarpaulin Waterproof Heavy Duty Balcony Rain Curtain PVC Plastic Sheet Metal Ring Hole Easy to Install Outdoor Cover
- Heavy Duty 10oz PVC Coated Mesh Vinyl Tarpaulin Dump Truck Tarps
- Waterproof Dustproof UV Resistant Clear Vinyl Tarp
Others also viewed
- Everything you know about pvc tarpaulin
- Something About PVC Tarpaulin
- The Difference Between PE And PVC Tarpaulin
- How to maintain the PVC tarpaulin
- Precautions for using pvc tarpaulin
- Which Tarp Material Lasts the Longest?
- The Best Material for a Lightweight Tarp
- Flame retardant mechanism of pvc tarps
- Dyeing process of PVC tarpaulin
- Several things to know when using pvc tarpaulin